Data leaks and breaches are flooding the news. Moreover, they show the tendency to increase, which is obviously alarming our lives have mostly shifted online. What’s even more worrying is that one can’t always know it happened.
When your data is stolen, cybercriminals have many options on how to use it. This may range from accessing your accounts, like Facebook, email, online banking, to committing financial crimes.
Any device regardless of the OS is at risk and Mac users are no exception. One of the tools that can protect your data is VPN, which considerably boosts protection. But what if you face issues or don’t know how to configure VPN on Mac to suit your needs? VPN Super Unlimited Proxy team has prepared some tips and tricks for you. Check them out below!
Mac Asking for VPN Connection Password – What to Do?
When trying to connect to your VPN provider’s servers on Mac, you may see a prompt, asking you to enter your authentication information.
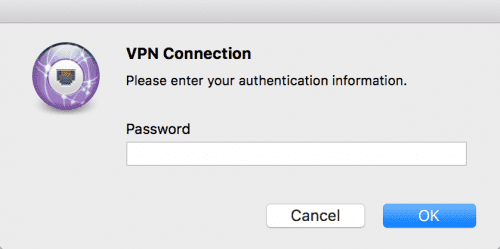
This authentication information for the VPN connection implies your Mac password. If you click Cancel, the window just pops up again directly. But even when you provide the password and press OK, the message may reappear again. In severe cases, it keeps reappearing over and over again even though the provided password is correct.
Such an intrusive popup may even urge you to delete your VPN once and for all. But don’t give in to this impulse! There is a solution to the issue. To get rid of the Mac asking for the VPN connection password issue, many VPN providers recommend removing the VPN interface from the Network settings. Here are the steps you need to follow on your Mac:
- Open System Preferences on your Mac and go to Network.
- In the list of network interfaces on the left, find the service associated with your VPN provider and click on it.
- Then, press the minus button at the bottom to delete the respective interface.
- You may also be asked to reboot your device.
Generally, this should solve the issue with authentication information for the VPN connection. If it doesn’t, we recommend you to turn to your VPN provider directly for further support.
Alternatively, you can use a VPN that doesn’t have this issue, like VPN Unlimited. To be honest, our users used to occasionally get this message on Mac, asking for a VPN connection password. However, our team is constantly working to improve the app and let you enjoy the best experience. We managed to successfully fix the issue and by now it’s been a long time since this irritating pop-up ever appeared.
How to Split Tunnel VPN Traffic on Mac

What is Split Tunneling and Why Use It
Split tunneling is the technique that lets VPN users route traffic from certain apps through the VPN tunnel while traffic from other apps remains on the default, non-VPN network. There are various reasons to use split tunneling:
- Keep on using the internet as usual and simultaneously unblock access to resources only available with a VPN, like a business server.
- Use a VPN and not interfere with the connection to other devices on the local network, like printers.
- Setting up certain devices like streaming media boxes, game consoles to use VPN and not affect other devices on the network.
- Routing torrent traffic via the VPN tunnel, while the rest of the internet traffic passes via the default network.
How to Set Up Mac VPN Split Tunnel
First of all, you need to check if your VPN service offers the feature. Though not too common, some providers do offer application-based Mac VPN split tunneling. What you generally need to do is:
- Open your VPN app.
- Set up split tunneling rules. You may create a list of trusted or blocked apps whose traffic should be routed through the VPN.
- Enable the VPN connection.
In case the software doesn’t offer Mac VPN split tunnel support, there is a built-in solution for manual setup. What you’ll need is superuser administrative privileges, an existing L2TP connection, and the destination subnet (target IP address). This option requires some technical knowledge. So to avoid any hassle, we’d rather recommend you to use the split tunneling feature of a VPN app, if possible.
Using TeamViewer with VPN to connect Mac and Windows
TeamViewer is a free remote desktop solution that allows establishing computer-to-computer connections for various purposes, including file transfer, remote control, etc. With TeamViewer installed both on your Mac and on another device (different PC or mobile), you can set up remote sessions and quickly connect to your Mac.
Want to connect to your Mac from a Windows PC and have a VPN on? No problem at all. Good VPN services like VPN Unlimited don’t interfere with the process of establishing a TeamViewer connection. You can still have your VPN on and use TeamViewer for your needs.
What Makes VPN Unlimited the Best VPN for Mac
VPN Unlimited offers numerous features to make your VPN experience on Mac as smooth as possible:
- 500+ super-fast VPN servers in more than 80 locations.

- Optimal server feature that automatically picks up the server that should give you the best performance.
- A selection of VPN protocols, including IKEv2, OpenVPN, WireGuard, and the special technology KeepSolid Wise.
- Optimal Protocol feature that will automatically select the best option for your connection.
- Trusted Networks that allow you to add networks you consider completely secure to trusted.
- DNS Firewall to protect your macOS device from malicious websites and malware infection.
- Run-on-Startup that will enable VPN as soon as you launch your device. So even if you forget to connect to a VPN server, the app will do it for you and keep you protected.
- Kill Switch to secure your sensitive data in case of sudden disruption of a VPN connection. So even if there is an issue with a VPN app on your Mac, you can be sure that none of your data leaks to the web and falls into the wrong hands.
- Cross-platform support, so that you can secure not only your Mac but other devices as well. VPN Unlimited supports iOS, Android, Windows, Linux, and also comes as a browser extension for Opera, Chrome, Firefox, and Edge.
How to Get Started with VPN Unlimited on Mac
To get started with VPN Unlimited and enjoy a smooth and protected VPN experience on your Mac, follow a few simple steps:
- Install VPN Unlimited app on your Mac. In case you can’t access the App Store, there is a Standalone version.
- Create a new KeepSolid ID or log in if you already have one.
- Connect to a VPN server by clicking the big Start button in the middle of the screen.